Thursday, May 26, 2011

thrifty finds

Yesterday was such a crappy day. It rained all day long and the sun was M.I.A. Add into the mix a baby that is teething hardcore, and Momma was rarin' for a break when Daddy got home from work.

So I decided to hit up Goodwill and another local thrift store that has proved to be a gold mine of goodies. I found some really cool things for the wedding and little man's b-day.
"Vintage" Baseballs - I'm not sure how old they really are, but they have that vintage look to them without being grubby. I scooped those suckers right up. $2.99 for 6.


Vintage pop corn bowls - I found these at Goodwill. I thought they'd go great with our vintage baseball theme. I picked them up 4 @ $0.49 each.


Babe Ruth Plate - $2.99 Now I'm not sure if we'll use this for the party, although I think we could use it to put some kind of food display on, but I figured at the very least we could put it in Morgan's room. Plus I knew Frank would be tickled by it. He's a Yankees fan.


Wire Basket - For....wait for it.... $0.79!! Seriously. I thought they must have tagged it wrong or at the very least there was a 1 missing before that 0.79. But I squinted and couldn't find it ;) I'm not sure what I'll use this one for yet either, maybe some kind of beverage holder?  I  just love it's shabby chicness. 


Vintage blue mason jars - Gotta love Goodwill. $0.99 each for these bad boys. Do you know how much they try to sell these to ya online? Try 5 bucks a pop. I haven't decided yet if I'll sell my collection online for a small fortune :) or if I'll keep them and display them all together. I think a shelf full of blue mason jars would be cute.


Alphabet blocks - $2.99. I have to google the best way to clean these bad boys before the little guy gets his hands on them.


I'm super excited about my goodies - and the deals! I haven't had this fruitful of a thrifting trip in a while!
post signature

Wednesday, May 25, 2011

9, almost 10 month old stats

Dude. How is he almost 10 months already? 
Weren't we just taking 9 months pictures yesterday? 
Tired of my shock that my kid is indeed growing older? 
I can't help it. It is just crazy how the time flies.

Yesterday was his belated 9 month appointment. The doc said we have a very healthy, developmentally on target little fella.
Stats:
Weight - 27 lbs 12 oz
Length - 29 and 3/4 inches

Funny story:
When the doc was listening to his lungs Morgan started breathing heavier and when she was getting ready to look in his mouth he opened wide for her. It was too funny. She said he was a good little patient.

After the appointment we had to go to the lab to get a finger poke to check for lead and anemia. He was not a very happy camper there for a few minutes, but after awhile the tears dried up and he moved onto sucking on his band aid and figuring out how to get that darn thing off. I just had to snap a few pics of him with his battle wound on the way home. ;) 


post signature

Monday, May 23, 2011

The Invitations

Let's start from the outside, shall we?

Envelopes:
I love, love, love Kraft paper. 
I think it is so very chic and can be dressed up or down. 
Casually elegant, so to speak ;) 
The font used for the printing of the addresses is called "Jane Austen" and I downloaded it from dafont.com
I wanted the look of handwritten calligraphy, but I don't have the handwriting for it and obviously wasn't going to pay someone to do it. Did you know people still do that? 
Yea. And the cost is outrageous.  


Postage:
I took an invitation to the post office a couple weeks before I mailed them out to pick out my postage. 
It was actually kind of fun, the lady at the counter got really excited about helping me pick out my wedding postage. 
I ended up paying $.04 more an invitation to mail them out just so that I didn't have to put a George Washington stamp on my envelopes :)We ended up with two "Wedding stamps" with white roses and "herb" postcard stamps for the response envelopes. I think the "herb" stamps look really beautiful with the Kraft paper.

Pocketfold:
I decided to go with a pocketfold style invitation because I just didn't like the look of a bunch of inserts stacked on top of each other and shoved into an envelope. 
I used this tutorial to make my own pocketfolds out of the Kraft cardstock. It was actually super simple and I loved that this particular tutorial only called for one sheet of cardstock per pocketfold. 
I tied the yellow/white bakers twine around the pocketfold to keep it closed. I decided to have this be the only color in the invitation after a vistaprint fiasco when my first invitation design arrived at my doorstep looking brown rather than grey. 


Inserts:
I printed the actual invitation and all of the inserts from my printer at home and designed them in powerpoint. 
The font used throughout the invitations is called "Traveling Typewriter" and is used throughout all of our wedding stationary (programs, favor tags, etc). I made the map on the back of the direction card using this technique and Word. It was kind of tedious, and it didn't turn out perfect, but I'm happy with it.


RSVP:
Our RSVP card was actually a shipping tag. Shipping tags are a big wedding trend right now and I have chosen to use them in several other areas of our wedding decor/stationary as well. I printed these on our home computer too. There was lots of trial and error involved in getting them to print straight. Some of the printing was actually kind of crooked, but I think it adds a little charm. 


That's all folks. My labor of love. I hope everyone liked them, and that they give my guests a little taste of what the feel/theme of our wedding will be.

...

And just because I'm always curious,


The Cost Breakdown : 
Envelopes via Envelope Mall: $ 23.25
Kraft cardstock via Hobby Lobby : $3.99
White cardstock via Staples : $14.99
Twine via The Twinery : $14.20
Wooden hearts via Joann Fabrics : $10 (estimate)
Paper cutter via Joann Fabrics : $12
Shipping tags via Staples : $5
Glue : $15 (estimate)
 Postage : $ 46.80

Total:  $145.23

Overall, I don't think the cost was too bad, especially considering some people spend hundreds on invitations. 
But, it also goes to show that DIY isn't always the cheapest way to go either. We could have definitely spent a lot less if we had bought a kit or ordered from somewhere like vistaprint.com, but our invitations are one of a kind and 100% custom - can't beat that. Plus, the cardstock, envelopes, paper cutter, and twine were used for multiple projects - so I got even more bang for my buck.


post signature

Friday, May 20, 2011

Randomness

1. Happy Friday. And by Happy Friday, I mean I wish it were Monday. 
2. Last week I came upon this idea to paint a headboard onto the wall behind your bed. Genius and cheap right? Well, not if you're living in a rental. 
 image via apartmenttherapy.com

Well, today I came across this decal that gives the same effect BUT it's totally removable. Sweet eh? 
 image via qinqindecal.com

Did I mention we have a hideous brass thing-a-ma-bobber sitting at the head of our bed right now? Yea, I reaaaally want this decal. Plus, it'll match our black damask bedding!! :)

3. This beauty of a deal popped up in my inbox this morning. What a deal eh? I wonder how much plane tickets are to Mexico these days. Can someone say honeymoon??


post signature

Wednesday, May 18, 2011

D-I-Why?

I. Must. Stop. Reading. Wedding. Blogs.

...tomorrow. :)
Inspiration just struck again while perusing a new blog I happened upon (Love and Lavender for those interested).

Now my printer is doing double time. My lovely mister even had to run out to buy me some new ink. 

I think I've discovered a new love affair with paper products during this whole wedding planning process. There are just too may cute ideas out there for...place cards (what my printer's currently spittin' out), menus, invitations, bunting, signage, and oh the list just goes on and on.

P.S. I still only got about half way through my water bottle project before starting this one. I'm tellin' ya, I have DIY project ADD. In my defense I did finally finish the guest "book" project tonight. Can check that off the lengthy to-do list. Sweet!
post signature

Tuesday, May 17, 2011

Custom water bottle labels

This is a pretty cheap and easy way to customize any party you throw - big or small.

It is a little time consuming if you're making a 100 or more like I am for our wedding, but for something like a birthday party, you could whip these up pretty quickly.

Supplies:
Water bottles (I bought a 24 pack at Target for $2.47)
Packing Tape ($1.99)
Scotch Tape (on hand)
Printer Paper (on hand)
Scissors (on hand)
Paper cutter (on hand, but can be bought cheaply at Hobby Lobby, Michael's or JoAnn's)
Microsoft Word, Power Point (or whatever program you choose to design your label)

Step 1: Design your label

I used Microsoft Word to design my labels. Here is my attempt at explaining to you how I did it. Sorry if it isn't clear. If you aren't up for designing your own labels, a simple google search will yield you plenty of free printable templates.

  • Go to Insert, then Shape and select the rectangle.
  • Right click on your rectangle and select Format Shape (there also should be a short cut at the top right of the screen) and change the size of your rectangle. 8.5 inches width by 2 inches length will work for most bottles. 
  • Change your shape fill to "no fill", and your outline to a very light gray so you have lines for cutting later. Now you have the basic outline for your labels. 
  • You can add in a picture or text of your choosing to design your label. 
  • After you have designed your label, you can group the shape, pictures and words together. 
  • Right click to copy the entire group. Then, paste several times down the length of the page. You should be able to fit 5 labels per page.  
 My labels, laminated and ready to go.

Step 2: Print, cut and "Laminate"
If you want your labels to be water proof you will need to "laminate" them with packing tape (I do, because mine will likely be in an ice bucket. If yours will be in a refrigerator, you probably can skip this step and simply tape your labels onto your bottles). 

This takes a little trial and error to learn how to do it smoothly and without getting your tape wrinkled, but it's pretty self explanatory. 

Lay a piece of tape over the top of each side and trim the ends as necessary. 

Step 3: Remove old labels, affix new pretty labels
Cut off your old labels and take your custom label and wrap it in it's place, securing with a piece of scotch table. 

 Newly labeled bottles with pile of old labels.


That's all folks! 
It's pretty easy once you get the hang of it. I found that I actually got a "cleaner" look and didn't mess up as much when I laminated while doing something else (watching TV) because I wasn't over analyzing.

I was so pleased with the way these turned out, I immediately designed a vintage baseball themed label for Morgan's birthday!

P.S. I also cut a square in the top of the package the water bottles came in so that I could put them back in the package after the label switch-a-roo. I won't be using mine right away, so I need an easy way to store them.


post signature

cupcakes...yummmmm


How delicious do these cupcakes {link} look? All of them. 

I must try out these recipes. 


Morgan's birthday cupcakes perhaps? 

Or wedding cupcakes? 

Ha! Not sure I'm feeling that crazy ambitious.

My current wedding project is custom water bottle labels. I hope to see this project through completion today since Frank is off. Unfortunately I have a lot of half done projects hanging in limbo waiting for completion. It's officially T minus 8 weeks, starting to feel a sense of urgency when I look at my to-do list.

Anyways, I'll post a custom water bottle label tutorial tonight or tomorrow.
post signature

Thursday, May 12, 2011

How cute is this nook of a baby's room?
That's it Morgan - we're moving you into the closet! Kidding.
post signature

Thursday, May 5, 2011

Happy Cinco de Mayo!


From my little tortilla loving boy to you!

We celebrated Cinco de Mayo with Tacos and homemade guacamole. And mama just may be enjoying a Skinnygirl Margarita after the little heads to bed (he's playing in his swing fighting sleep as I type). 

Hope you had a wonderfully yummy Cinco de Mayo too!!
post signature

Tuesday, May 3, 2011

Invitations!

Are done! Complete! Finished! 

Man, were they a labor of love. I'm so relieved to have them done and anxious to see what people think of them.

They aren't traditional, but they are very us. I only hope that people can see that and appreciate them.

They are stuffed, stamped and ready to go. Now I anxiously await the 8 week mark so I can send them off!
Eeek!

post signature

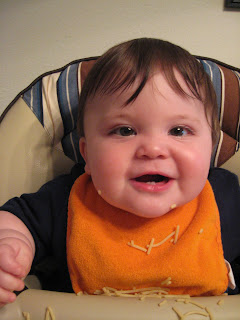
a 9 month old, his Daddy, and spaghetti


 Check out my two pearly whites!
 He can hardly believe it either!

 Nothing like a baby in his baby blues!


 Yummy, spaghetti!


My boys!
post signature