Showing posts with label craftiness.. Show all posts

Sunday, June 19, 2011

the chalkboard obsession continues....

Chalkboard paint is everywhere these days, and I've jumped on the bandwagon. I'm not exactly sure what it is about it, but I think it adds a little touch of whimsy to everything you brush it on. 

I have chalkboard paint that you brush on and spray paint.Yesterday I used the spray paint to transform two Goodwill frames into little chalkboards. I did not take any before pictures (bad, Ashley) but I will explain the process you and show you my fun after pics!

1. I picked up two frames at Goodwill for $1.99 each. One had a Christmas print in it and the other had a lion picture. It doesn't matter what's in the frame, as long as it has glass and you like the frame. Then I removed the prints and took the glass out of the frames. 

2. Laying the glass on a piece of cardboard I spray painted several coats onto each piece of glass, waiting for the paint to dry between coats (doesn't take long). After I got my desired coverage, I left the pieces of glass on the cardboard in the garage for 24 hours.

3. After 24 hours I replaced the glass in the frame and using the side of a piece of chalk, rubbed chalk all over the surface of my new chalkboard. After you cover the entire surface you wipe the chalk off (I used paper towel) and it's ready to go!

Here they are immediately after replacing them in their frames:


Here is one getting the "rub down":


Here is the final product:


I am going to use one in my laundry room, and the other is for the wedding :)


post signature

Wednesday, June 1, 2011

Chalkboard Wine Charms

I kind of am having a love affair with chalkboard paint. There's something chic, fun, and whimsical about anything with a little chalkboard on it.

I've used in on a couple of projects lately, but I'm sharing my wine charms with you. They are a cute way to keep track of your glass. All you have to do is write your initials on the charm with chalk. 

Supplies:
Something to use as your charm/chalkboard surface (I used buttons)
Jewelry wire
Wire cutters
Chalkboard paint
Paint brush
Chalk

1- Paint two coats of the chalkboard paint onto your button, waiting one hour between coats.
2 - Allow the chalkboard paint to "cure" for 24 hours.
3 - Rub a piece of chalk over the surface of your charm to prep it. 

4. Using your wire cutters cut your wire into even pieces of wire.
5. Bend the wire into a circle and thread the wire through the button hole.

6. Attach your wine charm to your glass and write your initals on your charm with chalk.


All done!

My empty wine glass :( I forgot to write my initials on for the pic.

post signature

Monday, May 23, 2011

The Invitations

Let's start from the outside, shall we?

Envelopes:
I love, love, love Kraft paper. 
I think it is so very chic and can be dressed up or down. 
Casually elegant, so to speak ;) 
The font used for the printing of the addresses is called "Jane Austen" and I downloaded it from dafont.com
I wanted the look of handwritten calligraphy, but I don't have the handwriting for it and obviously wasn't going to pay someone to do it. Did you know people still do that? 
Yea. And the cost is outrageous.  


Postage:
I took an invitation to the post office a couple weeks before I mailed them out to pick out my postage. 
It was actually kind of fun, the lady at the counter got really excited about helping me pick out my wedding postage. 
I ended up paying $.04 more an invitation to mail them out just so that I didn't have to put a George Washington stamp on my envelopes :)We ended up with two "Wedding stamps" with white roses and "herb" postcard stamps for the response envelopes. I think the "herb" stamps look really beautiful with the Kraft paper.

Pocketfold:
I decided to go with a pocketfold style invitation because I just didn't like the look of a bunch of inserts stacked on top of each other and shoved into an envelope. 
I used this tutorial to make my own pocketfolds out of the Kraft cardstock. It was actually super simple and I loved that this particular tutorial only called for one sheet of cardstock per pocketfold. 
I tied the yellow/white bakers twine around the pocketfold to keep it closed. I decided to have this be the only color in the invitation after a vistaprint fiasco when my first invitation design arrived at my doorstep looking brown rather than grey. 


Inserts:
I printed the actual invitation and all of the inserts from my printer at home and designed them in powerpoint. 
The font used throughout the invitations is called "Traveling Typewriter" and is used throughout all of our wedding stationary (programs, favor tags, etc). I made the map on the back of the direction card using this technique and Word. It was kind of tedious, and it didn't turn out perfect, but I'm happy with it.


RSVP:
Our RSVP card was actually a shipping tag. Shipping tags are a big wedding trend right now and I have chosen to use them in several other areas of our wedding decor/stationary as well. I printed these on our home computer too. There was lots of trial and error involved in getting them to print straight. Some of the printing was actually kind of crooked, but I think it adds a little charm. 


That's all folks. My labor of love. I hope everyone liked them, and that they give my guests a little taste of what the feel/theme of our wedding will be.

...

And just because I'm always curious,


The Cost Breakdown : 
Envelopes via Envelope Mall: $ 23.25
Kraft cardstock via Hobby Lobby : $3.99
White cardstock via Staples : $14.99
Twine via The Twinery : $14.20
Wooden hearts via Joann Fabrics : $10 (estimate)
Paper cutter via Joann Fabrics : $12
Shipping tags via Staples : $5
Glue : $15 (estimate)
 Postage : $ 46.80

Total:  $145.23

Overall, I don't think the cost was too bad, especially considering some people spend hundreds on invitations. 
But, it also goes to show that DIY isn't always the cheapest way to go either. We could have definitely spent a lot less if we had bought a kit or ordered from somewhere like vistaprint.com, but our invitations are one of a kind and 100% custom - can't beat that. Plus, the cardstock, envelopes, paper cutter, and twine were used for multiple projects - so I got even more bang for my buck.


post signature

Wednesday, May 18, 2011

D-I-Why?

I. Must. Stop. Reading. Wedding. Blogs.

...tomorrow. :)
Inspiration just struck again while perusing a new blog I happened upon (Love and Lavender for those interested).

Now my printer is doing double time. My lovely mister even had to run out to buy me some new ink. 

I think I've discovered a new love affair with paper products during this whole wedding planning process. There are just too may cute ideas out there for...place cards (what my printer's currently spittin' out), menus, invitations, bunting, signage, and oh the list just goes on and on.

P.S. I still only got about half way through my water bottle project before starting this one. I'm tellin' ya, I have DIY project ADD. In my defense I did finally finish the guest "book" project tonight. Can check that off the lengthy to-do list. Sweet!
post signature

Tuesday, May 17, 2011

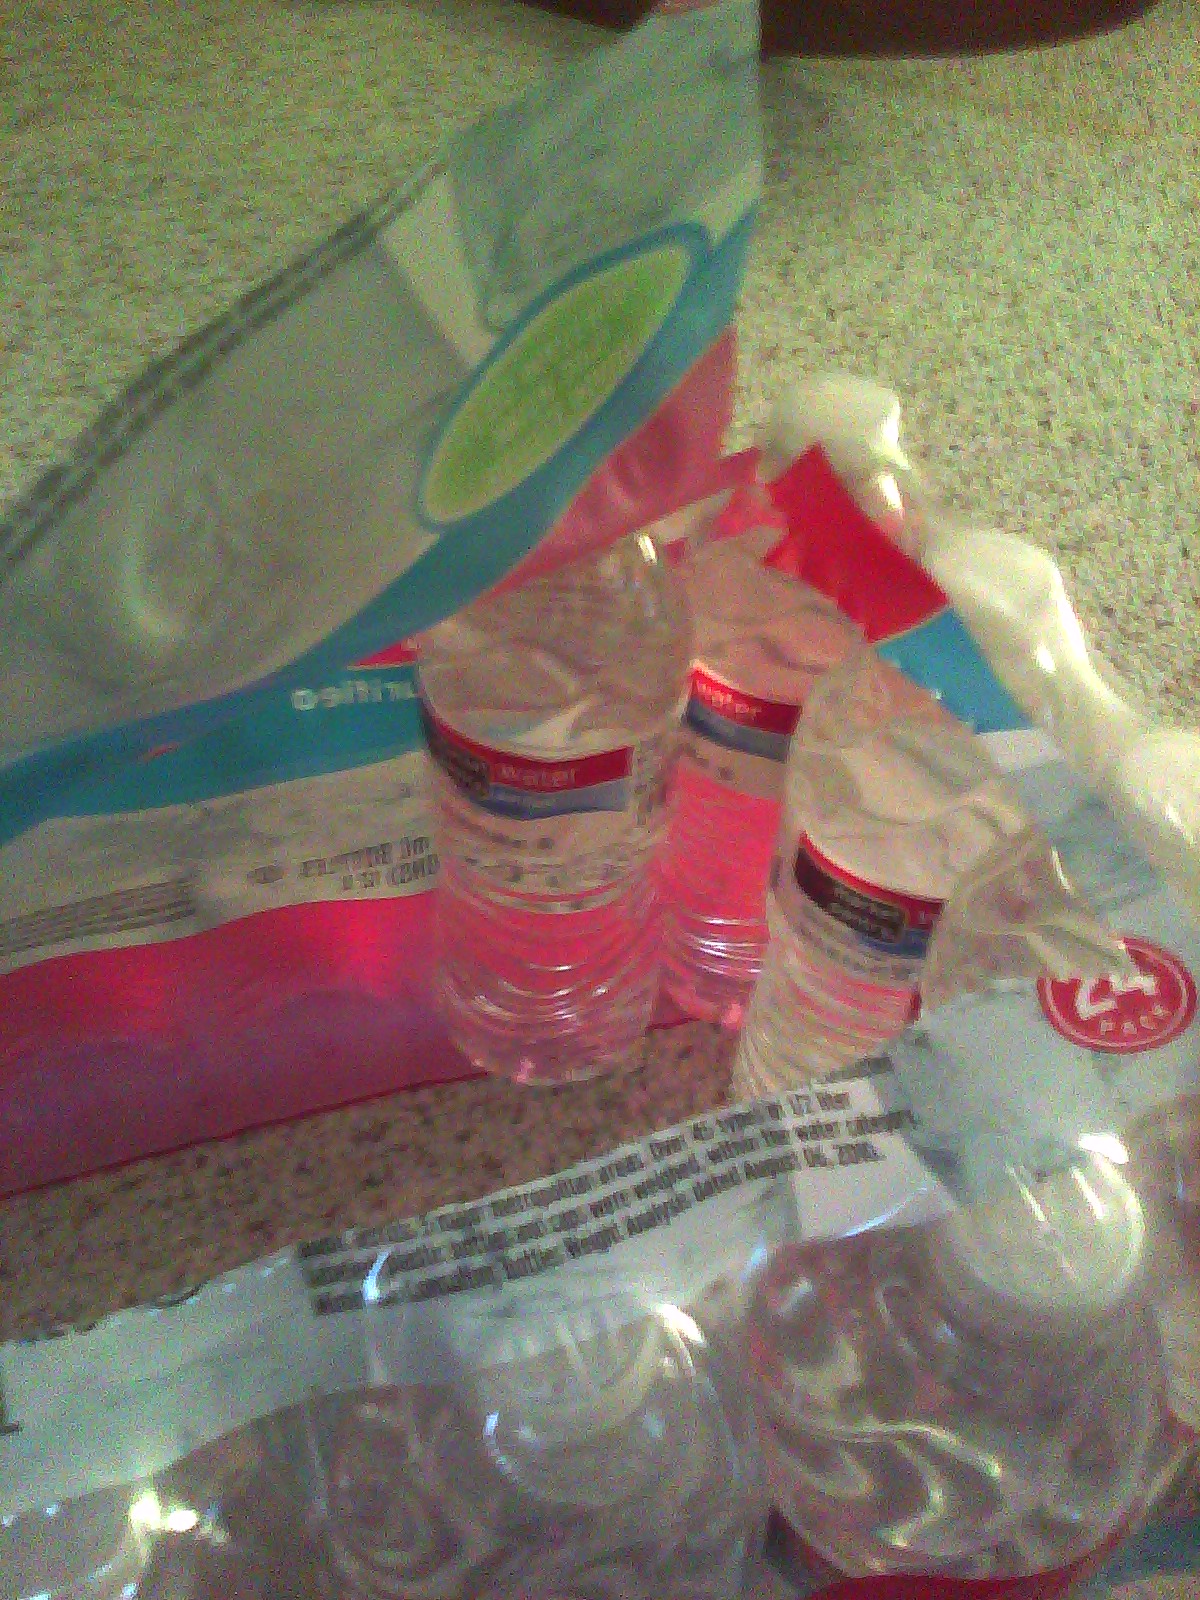
Custom water bottle labels

This is a pretty cheap and easy way to customize any party you throw - big or small.

It is a little time consuming if you're making a 100 or more like I am for our wedding, but for something like a birthday party, you could whip these up pretty quickly.

Supplies:
Water bottles (I bought a 24 pack at Target for $2.47)
Packing Tape ($1.99)
Scotch Tape (on hand)
Printer Paper (on hand)
Scissors (on hand)
Paper cutter (on hand, but can be bought cheaply at Hobby Lobby, Michael's or JoAnn's)
Microsoft Word, Power Point (or whatever program you choose to design your label)

Step 1: Design your label

I used Microsoft Word to design my labels. Here is my attempt at explaining to you how I did it. Sorry if it isn't clear. If you aren't up for designing your own labels, a simple google search will yield you plenty of free printable templates.

  • Go to Insert, then Shape and select the rectangle.
  • Right click on your rectangle and select Format Shape (there also should be a short cut at the top right of the screen) and change the size of your rectangle. 8.5 inches width by 2 inches length will work for most bottles. 
  • Change your shape fill to "no fill", and your outline to a very light gray so you have lines for cutting later. Now you have the basic outline for your labels. 
  • You can add in a picture or text of your choosing to design your label. 
  • After you have designed your label, you can group the shape, pictures and words together. 
  • Right click to copy the entire group. Then, paste several times down the length of the page. You should be able to fit 5 labels per page.  
 My labels, laminated and ready to go.

Step 2: Print, cut and "Laminate"
If you want your labels to be water proof you will need to "laminate" them with packing tape (I do, because mine will likely be in an ice bucket. If yours will be in a refrigerator, you probably can skip this step and simply tape your labels onto your bottles). 

This takes a little trial and error to learn how to do it smoothly and without getting your tape wrinkled, but it's pretty self explanatory. 

Lay a piece of tape over the top of each side and trim the ends as necessary. 

Step 3: Remove old labels, affix new pretty labels
Cut off your old labels and take your custom label and wrap it in it's place, securing with a piece of scotch table. 

 Newly labeled bottles with pile of old labels.


That's all folks! 
It's pretty easy once you get the hang of it. I found that I actually got a "cleaner" look and didn't mess up as much when I laminated while doing something else (watching TV) because I wasn't over analyzing.

I was so pleased with the way these turned out, I immediately designed a vintage baseball themed label for Morgan's birthday!

P.S. I also cut a square in the top of the package the water bottles came in so that I could put them back in the package after the label switch-a-roo. I won't be using mine right away, so I need an easy way to store them.


post signature

Tuesday, May 3, 2011

Invitations!

Are done! Complete! Finished! 

Man, were they a labor of love. I'm so relieved to have them done and anxious to see what people think of them.

They aren't traditional, but they are very us. I only hope that people can see that and appreciate them.

They are stuffed, stamped and ready to go. Now I anxiously await the 8 week mark so I can send them off!
Eeek!

post signature

Thursday, April 28, 2011

Pom Poms!

Since we moved into the new place, Morgan's room has needed a little something added to it as the room is a little bigger than the last and it has higher ceilings. 

So, yesterday I decided to try my hand at making some of the tissue paper pom pom's I've seen all over the internet. I think they turned out great and add great color and a little height to balance out the tall ceilings. 


Supplies:
8 sheets of tissue paper per pom  

(ETA: After living with these for a few days, I've decided that next time I will use more sheets so that they are fuller. So experiment to find your desired fullness).

floral wire (I bought mine at the dollar tree)
fishing line
scissors

Mine cost about $1.50 each to make as I already had the floral wire and fishing line on hand. 

Step 1: Distract the baby with toys.


Step 2: Stack your 8 sheets of tissue paper, starting at one end, fold the length of the paper accordion style with each fold about 1.5 inches.


Step 3: Wrap floral wire around the middle of the accordion fold you have created to secure.


Step 4: Trim each end. You can make it rounded like mine, or pointed for a different, more floral-y effect. 


Step 5: Tie a piece of fishing line around the floral wire for hanging.

Step 6: Gently pull apart the sheets of tissue paper pulling towards the center. Then shape it so that it looks more rounded.


That's all folks! If my instructions were confusing, you can check out this link for instructions from the Queen of craft herself.
post signature

Thursday, March 31, 2011

Something blue...dyeing my crinoline

You know the saying...."Something old, something new, something borrowed, something blue, and a six pence in her shoe!" Hadn't heard of the last one? Me either, until recently, but when I heard of it, I decided I had to have it too. So I went on ebay and ordered myself a six pence. It's on it's way for $1.79.  Don't you just love the world wide web?

So, I'm still not sure what my something old and something borrowed will be, but I do have my something blue covered. I was inspired by pics like this:


How cool is that? I love the little hidden pop of color than can only be seen if you raise up your dress a little. I just love the look of it peeking out from under, and it makes for a fabulous photo op. 

Well, I've been thinking about dying my crinoline blue for a while now, but I hadn't really got the nerve to do it. I was afraid that A. It would ruin my crinoline. B. The dye wouldn't take to the material my crinoline was made of (nylon). or C. I would end up with a blue washing machine. Well, today I picked up a box of RIT dye and bit the bullet, and I'm so glad I did. 

The before pic:


The after pics: 


It did come out a little darker than I had planned, but I'm okay with it. Like I said, it's only going to peek out of the bottom of my dress a little - if I let it. And those white streaks in the first pic aren't really there, I think those are just from the flash.

The process:
1. Set your washer to the highest and hottest water setting. Let the basin fill up. 

2. Dunk your crinoline in the hot water to get it wet and then set aside. 

3. Premix the powdered dye in a little water in a separate glass container. 

4. Add the dye mixture to the water in the washing machine. 
 
5. Add your crinoline, shut the lid, and cross your fingers.

6. Easy, no? Here's the labor intensive/boring part. You have to stop the machine every 3 minutes to untangle your crinoline so you don't end up with a tye-dye effect. Not the bridal look we're going for. 

4. After 30 minutes of this, you set the machine to rinse (cold) and let the cycle finish. 

5. You can put it in the dryer on low, but I decided to hang mine to dry because I didn't want it to shrink.

*Immediately after you take the crinoline out of the washer, run the washer again on the hottest and longest cycle with detergent and 1 cup of bleach to ensure your next load of clothes doesn't come out in a lovely blue hue.*

**Oh, and wear plastic, disposable gloves so you don't end up with blue fingers. Not cute.**
post signature

Tuesday, January 11, 2011

heart-photo line

I've been planning out this project in my head for weeks, but finally got the ambition to tackle it today because we were snowed in. 

Well, we weren't really snowed in, I just didn't want to take little man out in this snowy weather alone. So we ran our errands once Daddy got home :)

Anyways, it really took no time at all to make this once all the supplies were gathered. 

I'm proud of myself because this is actually an original idea of mine. Not that you won't find book paper and twine projects out there; they're all over blogland. But, I haven't seen a project exactly like this one.

 So....


Supplies:


adorable pictures of your offspring
twine/jute
clothespins
scrapbook paper
scissors
pencil
craft glue
hot glue gun
old book
2 cup hooks


Directions: 

You can do these in any order really, but this is how I did it.

Measure out the length of your twine and tie a loop at each end to hang your line.

Tear out your book pages. Trim the white off. Cut the page in half.

Fold that half of the page in half and trace half of a heart on the folded side.

Cut out the heart shape. 


Repeat for however many hearts you want to make.

Trace a clothespin onto the scrapbook paper (I used the paper left over from my ABC magnets project).

Glue the paper onto the clothespins using the craft glue.


Layout your pictures with your book page hearts.


Clip your pictures on with the clothespins.

Glue the book page hearts on in between each picture with the hot glue gun.
 (You will burn your fingers, sorry).

Screw your cup hooks into the wall. String up your heart-photo line.

Step back and admire your work.

Pretty, huh?


Again, I kept help but notice that these pics do not do it justice. It's much prettier in real life.

Funny side note: The book I used was a true crime book so some of the words on my little heart cut outs are kind of funny....ya know, "blood", "murder", "courtroom". Real comfy, cozy stuff :)

post signature

Thursday, January 6, 2011

tiny feet - FREE canvas print

Have you heard about the deal at canvaspeople.com

You get a FREE 8x10 canvas of a photo of your choice and only pay shipping and handling. 

I had seen the deal floating around for quite some time, but I finally placed my order a couple of weeks ago and this is the beaut that arrived in the mail:

It's a pic of little man's tiny, wrinkly feet from when he was first born. It hasn't found a permanent home yet. I think it will end up in our room eventually when I get around to redoing it. 

The canvas's are beautiful and such a great deal. 


post signature

Wednesday, January 5, 2011

Baby Snuggler

I came across this post to make a "Baby Snuggler" at In Between Laundry a few weeks ago.

Anything that is designed to make baby sleep better, and thus Mom and Dad, is worth it's weight in gold in my book.

I bought the bag of rice right away, but didn't get around to actually working on the project until yesterday.

You can see the 5 lb bag of rice in one of the "before" pictures below, sitting in a cabinet it didn't belong in.

So, cleaning out the cabinets inspired me to finally pull the cover off the new sewing machine and make this baby snuggler.


Supplies needed:


flannel blanket
5 lb bag of rice
scissors and sewing machine (duh)


Directions:

Cut a 12 x 12 ish piece of flannel
Fold it with right sides together.
Sew up the 1 long side and 1 of the short sides.
Turn right side out.
Fill with rice (not too much, you want to be able to fold to fit in the microwave).
Fold opening and sew shut.
Tis all!

Here's the final product with the leftover rice pictured so you can see how much I used.


And here it's pictured in his crib with mommy and daddy's little man's other sleep aid. Ahh, the mythical Seahorse, heaven sent!


Just heat in microwave and snuggle next to baby. Your little one will think he has a warm body next to him.

Sneaky, sneaky!


post signature